User Manual
This section provides a detailed description of each function in the program. It explains how to create, edit, visualize, and analyze an open channel model, as well as how to use the various tools available in the interface.
The goal of this manual is to serve as a reference to fully understand how the software works, from the initial project setup to the interpretation of results. You can refer to it at any time to resolve specific questions about a function or workflow.
Create new model
In the left panel, click the button to display the platform’s model types.

Click Shallow foundation to display the available templates.
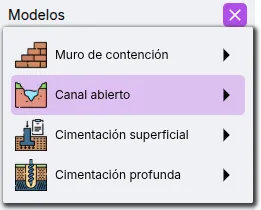
Select the template that best fits your project.
Your model is now ready to be edited and run.

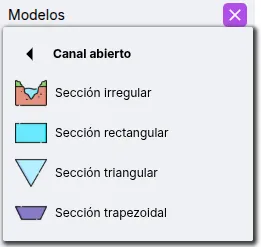
Currently, the following templates are available:
- Irregular section
- Rectangular section
- Triangular section
- Trapezoidal section
Rename, duplicate, and delete model
In the model list on the left panel, hovering over a model will reveal three options.
![]()
- - Rename model: Click to enable editing. Enter a new name and press enter or click .
- - Duplicate model: Automatically creates a copy of the model.
- - Delete model: Shows a confirmation dialog to delete the model.
Input parameters
Input parameters are located in the right panel. To see real-time updates to the model, the Preview view must be active.
![]()
Below is a description of each available option.
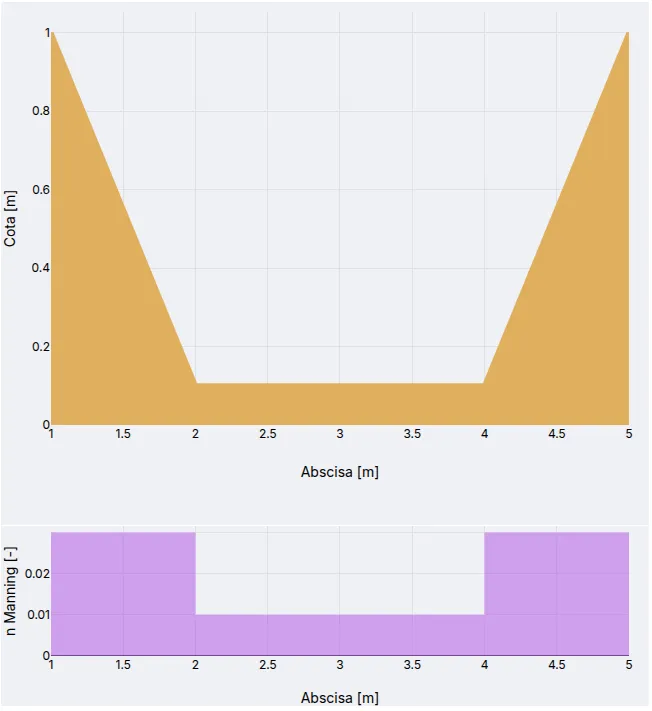
Geometry and roughness
The geometry and roughness define the cross-section of the channel.
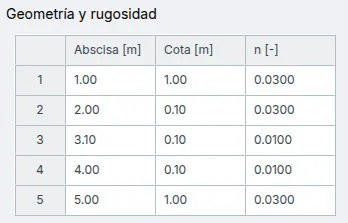
The available parameters are:
- Abscissa
- Elevation
- Manning’s n
Both geometry and roughness have a visual representation.
Additional parameters
Additional parameters complete the hydraulic model.
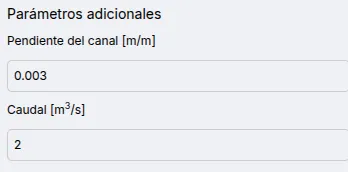
Available parameters:
- Channel slope
- Flow rate
Run model
To run the model, press the button located at the top of the right panel.![]()
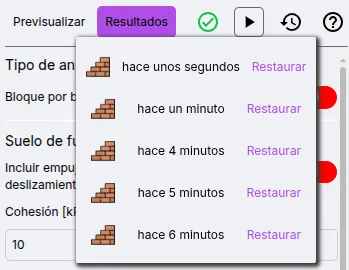
History
If you’ve run a model and want to return to a previous version, press the button to view the last five versions. Click the restore button to return to the desired version.
Model verification
The software performs certain checks before allowing execution to minimize the risk of errors. When a model is valid, the validation indicator shows the icon .
![]()
When the model has inconsistencies, the icon will be . Click the icon for details on the inconsistencies.
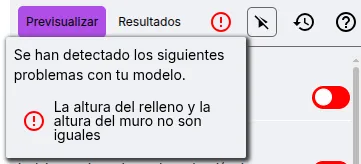
The implemented verifications are:
- Manning’s roughness coefficient must be positive.
- Abscissas must be in increasing order — each value must be greater than the previous one.
Results
Once the model has been run, the Results view will be displayed. To return to the model preview, click the Preview button.
![]()
The computed results are shown on multiple cards according to their category.
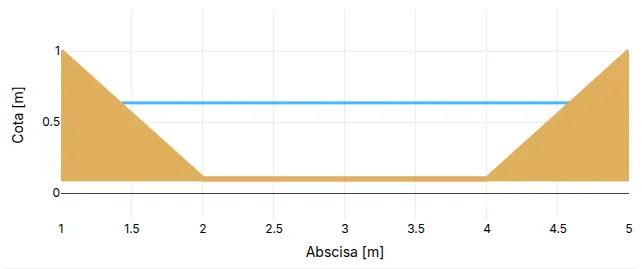
Full section
Displays the filled cross-section.
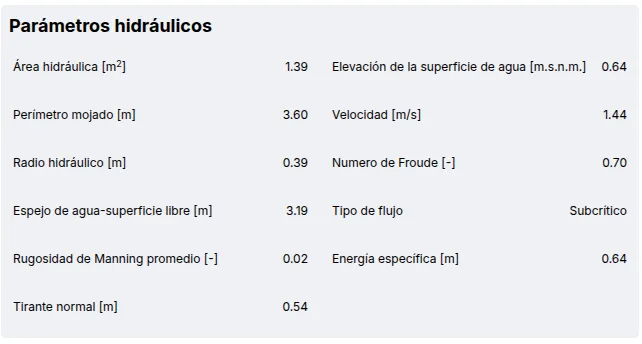
Hydraulic parameters
Displays the hydraulic parameters of the section.
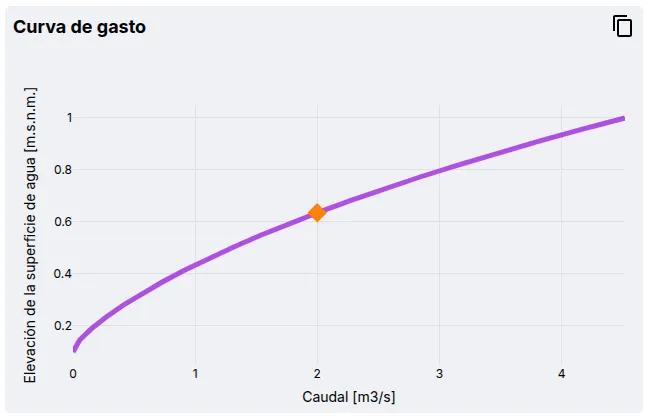
Rating curve
Displays the section’s rating curve, with an option to copy the values using the button.