Application
Through the application, you can access the contents of the work areas. Here, you’ll be able to create, edit, and collaborate on the engineering models required by your project.
In general, the application is divided into four sections:
- The top bar ①
- The left panel ②
- The right panel ③
- The viewer ④

Creating and selecting models
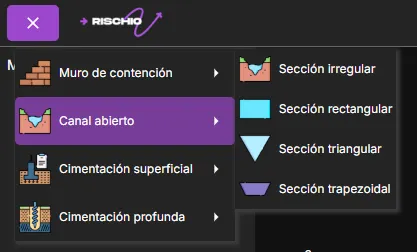
In the upper left corner, you’ll find the button. Clicking it will show you the list of available models in Rischio. Clicking on a model will display a list of fully editable templates that allow for agile model development.
Once you’ve selected the template that best fits your project, assign it a name and click Create model.
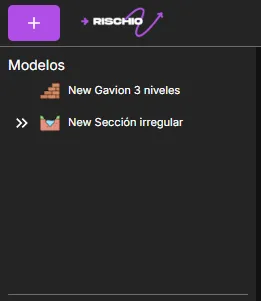
After creating the model, it will appear in the model list on the left panel. All models you create will be added there, and you can select them as needed.
Duplicating and deleting a model
To duplicate or delete a model, select it from the list in the left panel.
Below this list, you’ll find the Model details section, where you’ll see the and buttons.
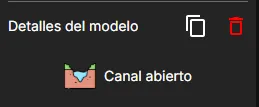
When duplicating a model, it will appear in the list with the same name as the original, plus the suffix (copy).
If you choose to delete a model, confirmation will be requested.
Renaming and adding a description
To rename or add a description, go to the Model details section. Changes to these text fields are applied automatically, without needing to press any additional button.

Model preview
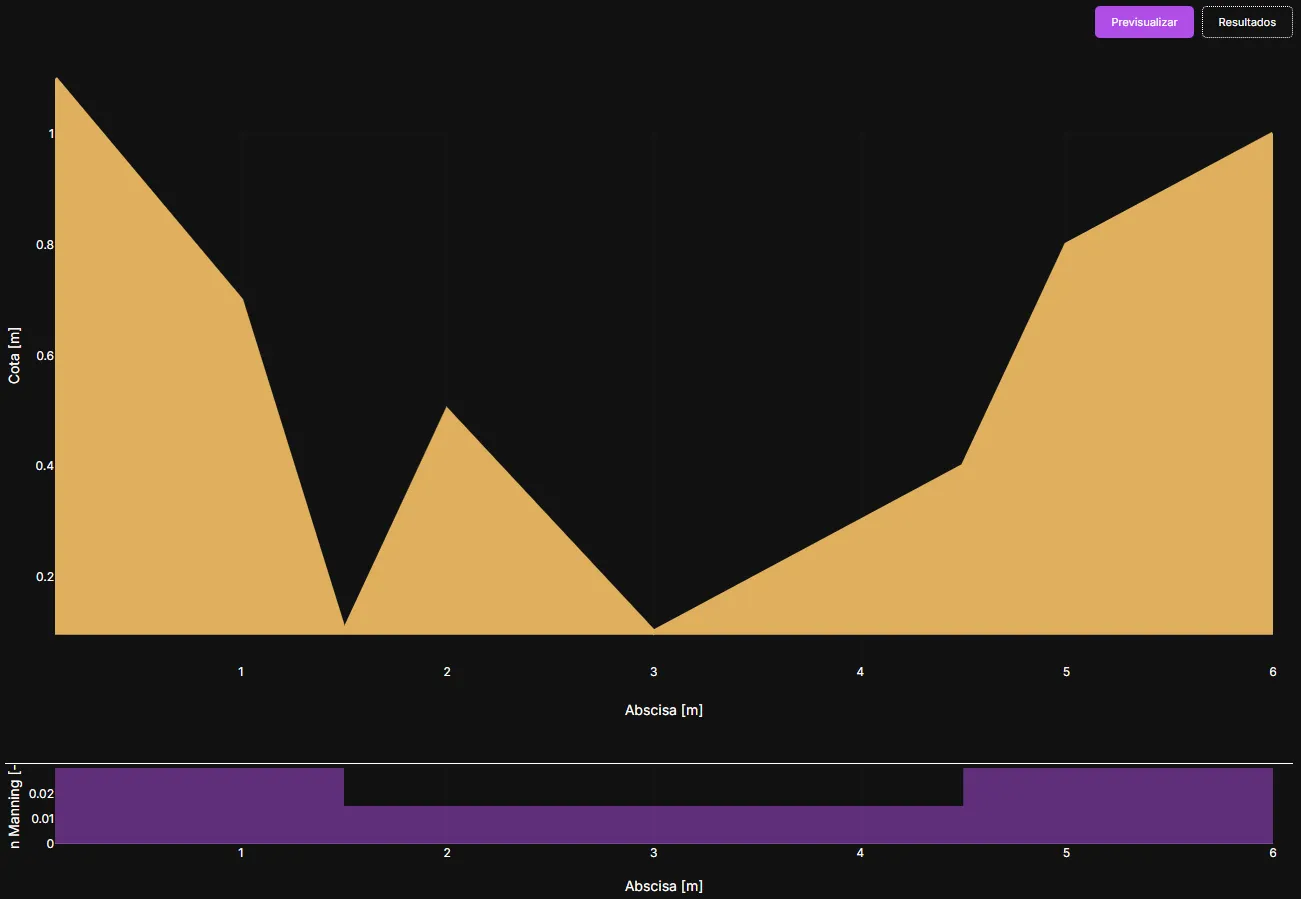
In the viewer, you can preview the active model. Make sure the Preview button is selected. A description of the preview is available in the help section for each model type.
Current user
When a model is open, the top bar will show the profile picture of the user currently editing and running the model. Only that user can execute the model. Once they select a different model, it becomes available for others.
![]()
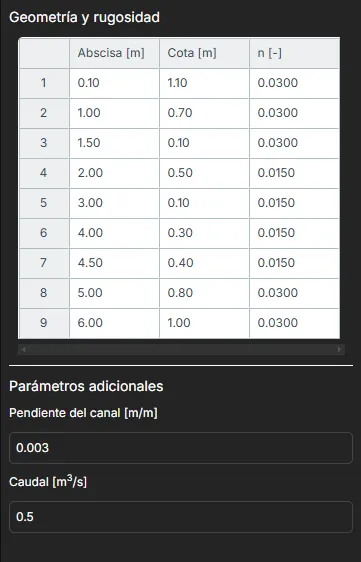
Editing the model
To edit the model, go to the right panel. There you’ll find the various options and parameters for each model type. Parameter descriptions are available in the help section for each model type.
Running the model
Once the model has been configured with the required parameters, you can run it using the button on the right side of the top bar.
![]()
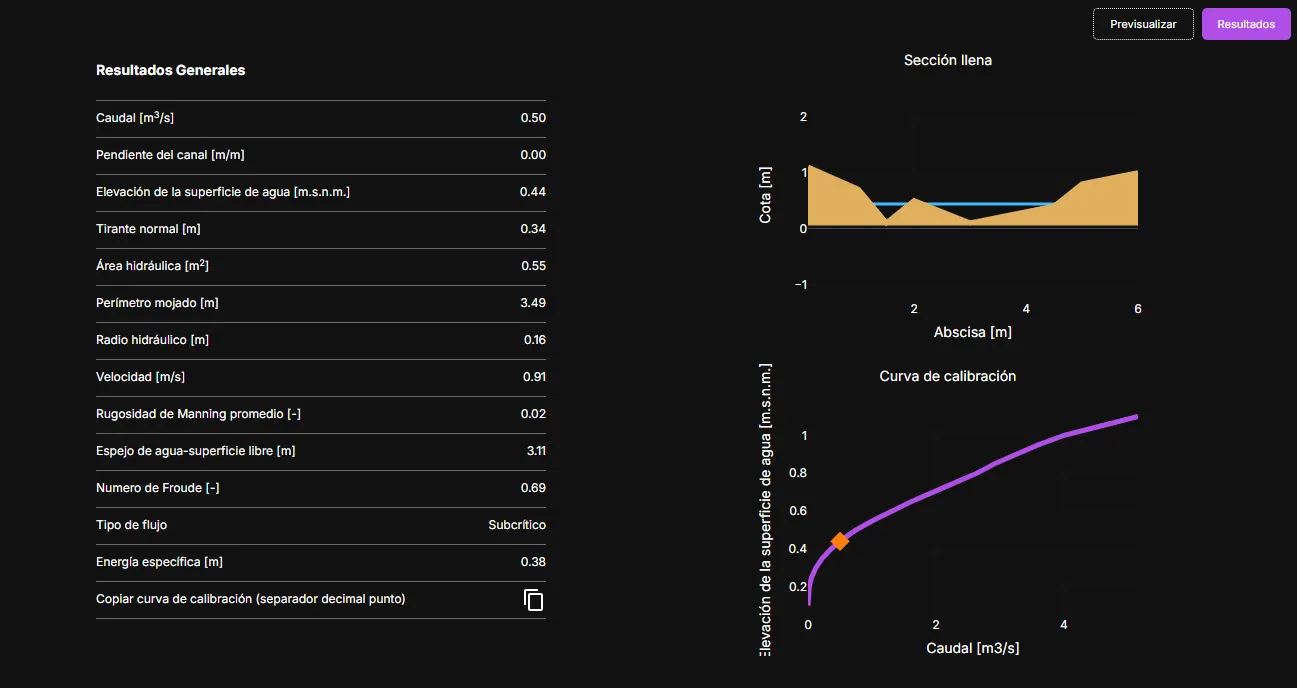
Result
After running the model, the viewer will switch from Preview to Results. Here, you’ll find all values from the executed analysis. Result descriptions are available in the help section for each model type.
History
Once the model is run for the first time, a icon will appear on the right side of the top bar. There you can find the last five executions of the selected model. Click the model you want to restore to return to a previous version.
